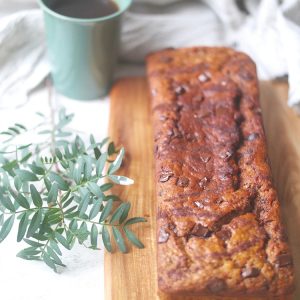
I’m all about easy no-knead bread recipes, such as this buckwheat bread recipe. A sweet bread recipe easily tastes more like a cake, don’t you think? But not this one. It’s sweet, yet not too cakey. This oil-free applesauce bread is a game changer and you will want to make it more than once.

Healthy Applesauce Bread
This applesauce bread is oil-free and naturally sweetened, made with whole grains and rolled oats. If you don’t mind using oil, you can read the notes in the recipe below. If you use oil in this recipe the bread will be less chewy.
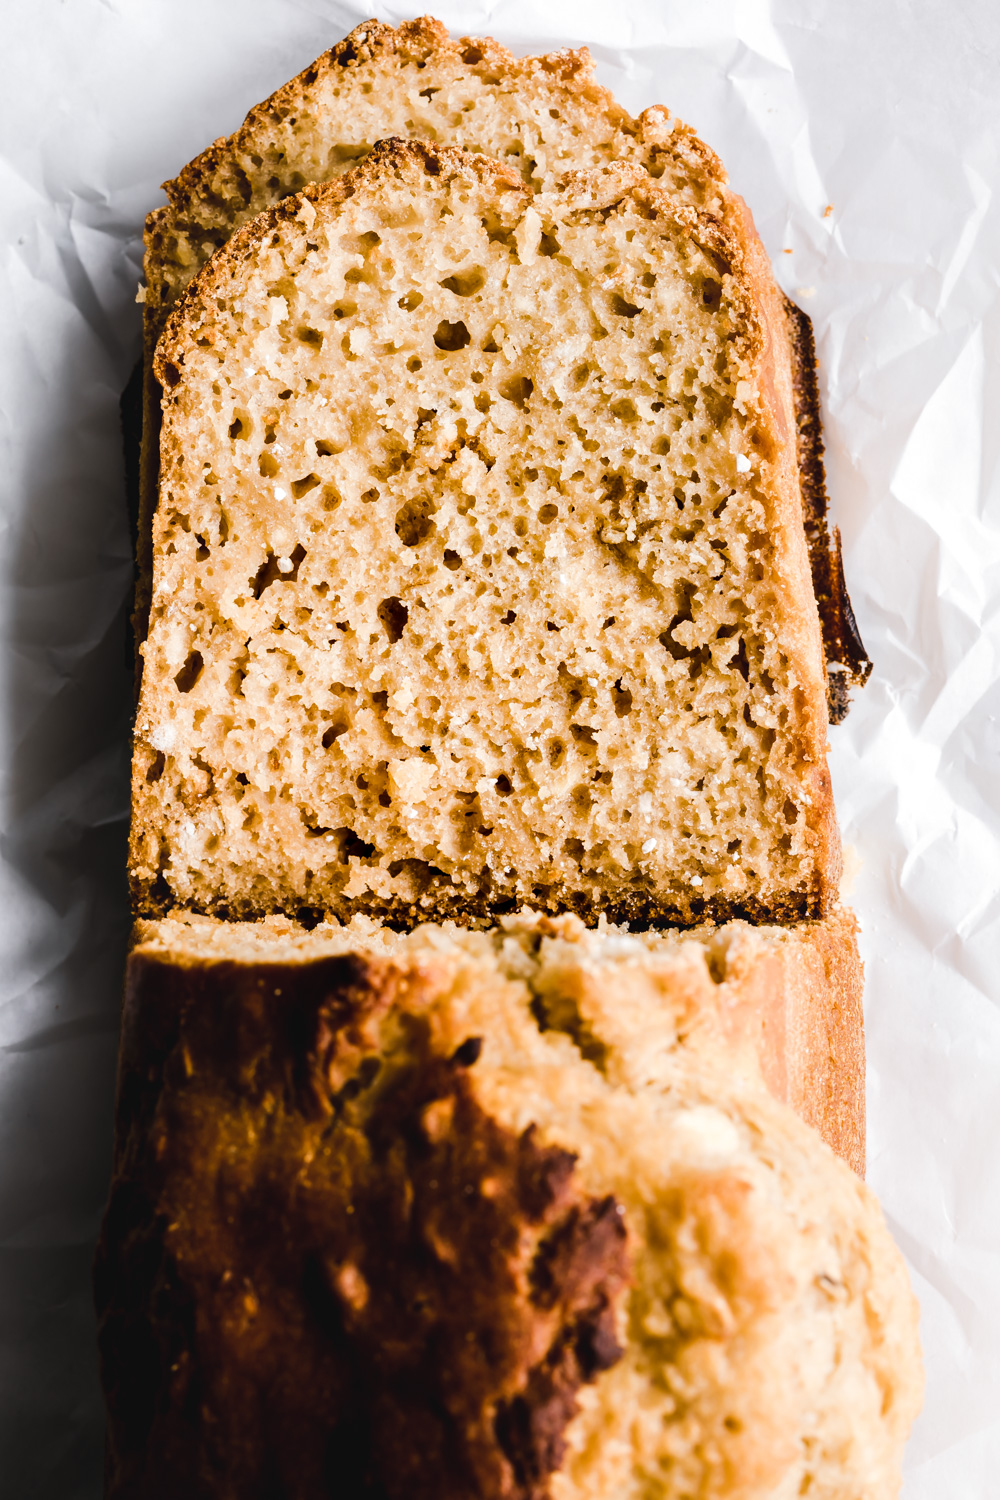
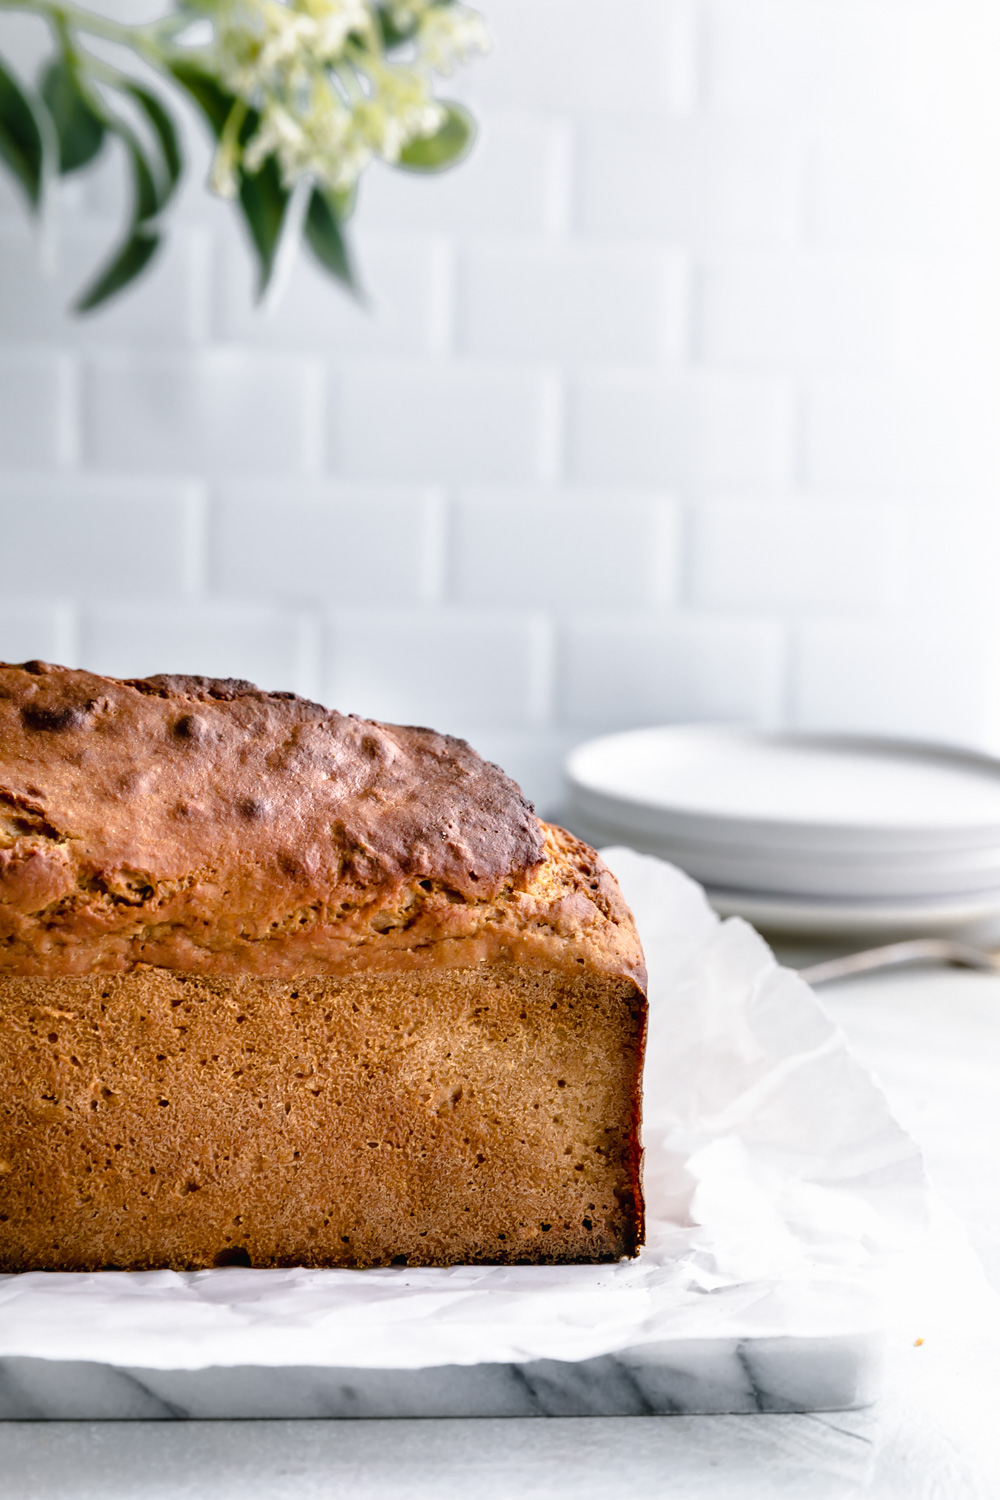
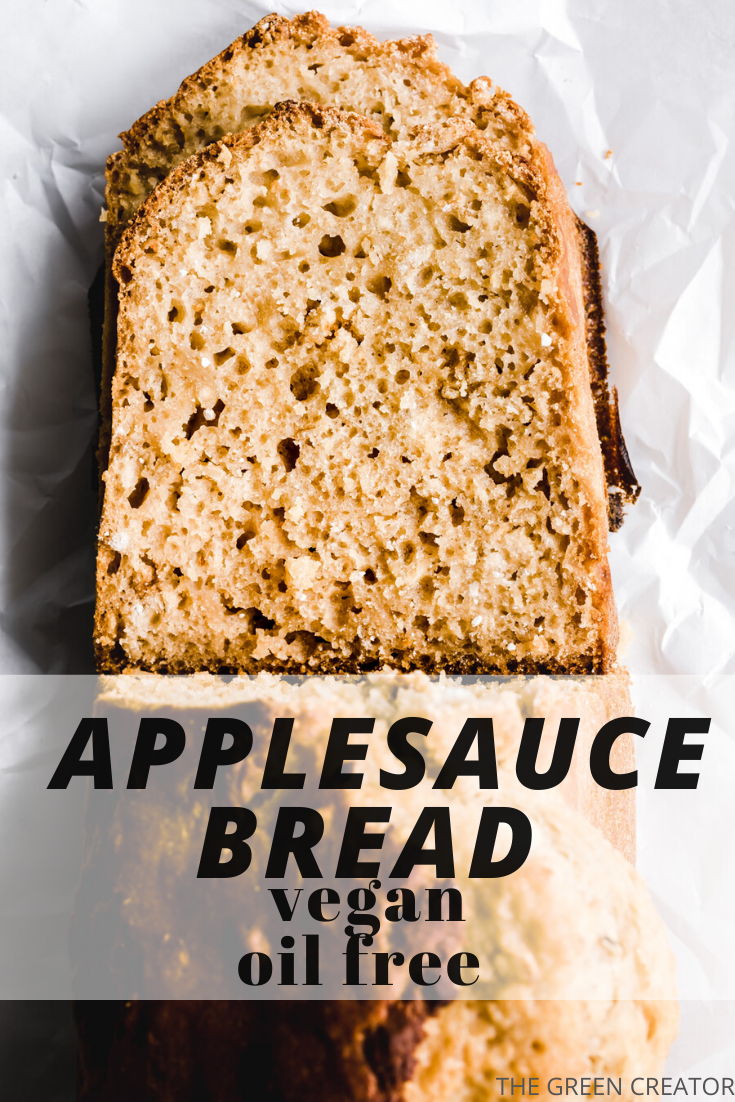
This applesauce bread is moist and soft with a slightly crunchy outside. I personally love a slice with my daily Dandy Blend, but it would also be great for breakfast.
Applesauce
Since I make this bread about twice a week I don’t always make my own applesauce, but you can easily make your own. This recipe for applesauce would be great to use for this bread. I would make a bigger batch and store for later. Just in case you would like to make an extra loaf later in the week.
When I don’t make my own applesauce, I buy unsweetened applesauce in a glass jar and it works wonderful with this recipe.

How To Make Applesauce Bread
The how-to steps are easy. Simply combine the flour, oats, baking powder, baking soda, cinnamon, and salt in a mixing bowl and mix well.
Then add in the wet ingredients, so the applesauce, maple syrup and plant-based milk. Mix again.
You don’t have to overmix it. Simply mix the dry and wet ingredients until they are combined. There is no need to use a kitchen appliance for this step.
Next, pour the batter into a baking loaf pan and bake for about 45 minutes.
Once done, let the bread cool for about 20 minutes.
I prefer a slightly crunchy outside, but if you would like the outside of the bread to be moist, simply cover the bread with a clean and dry towel for about 2 hours.
If your bread is not devoured within a day, you will notice that the taste and texture is only better the day after.
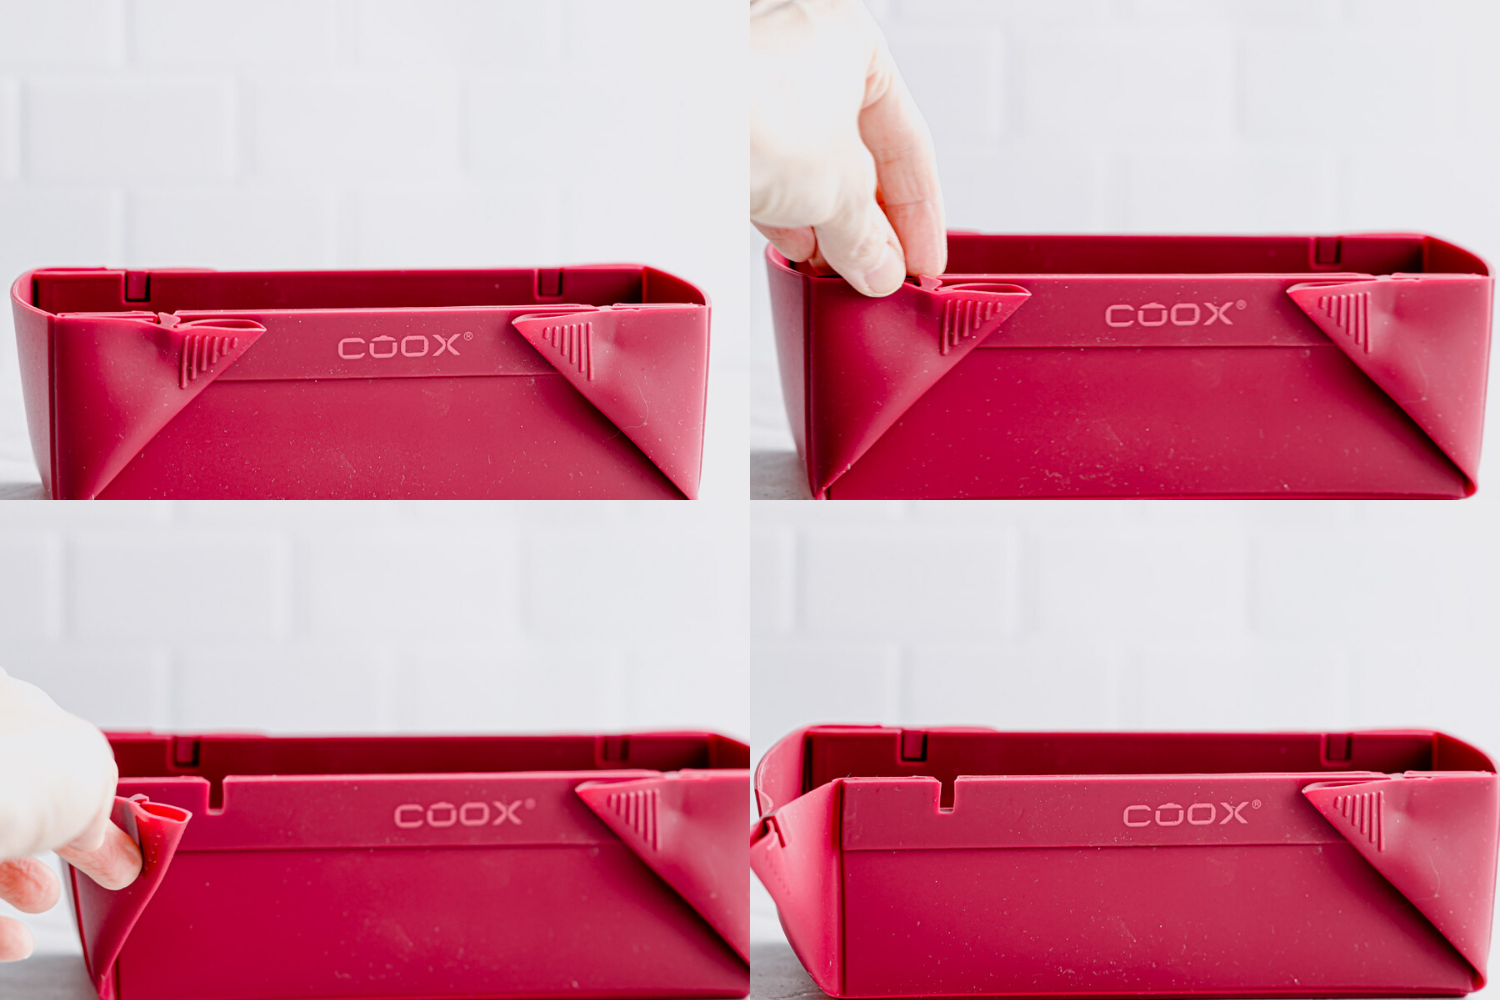
coox Wunderform for perfect oil-free baking
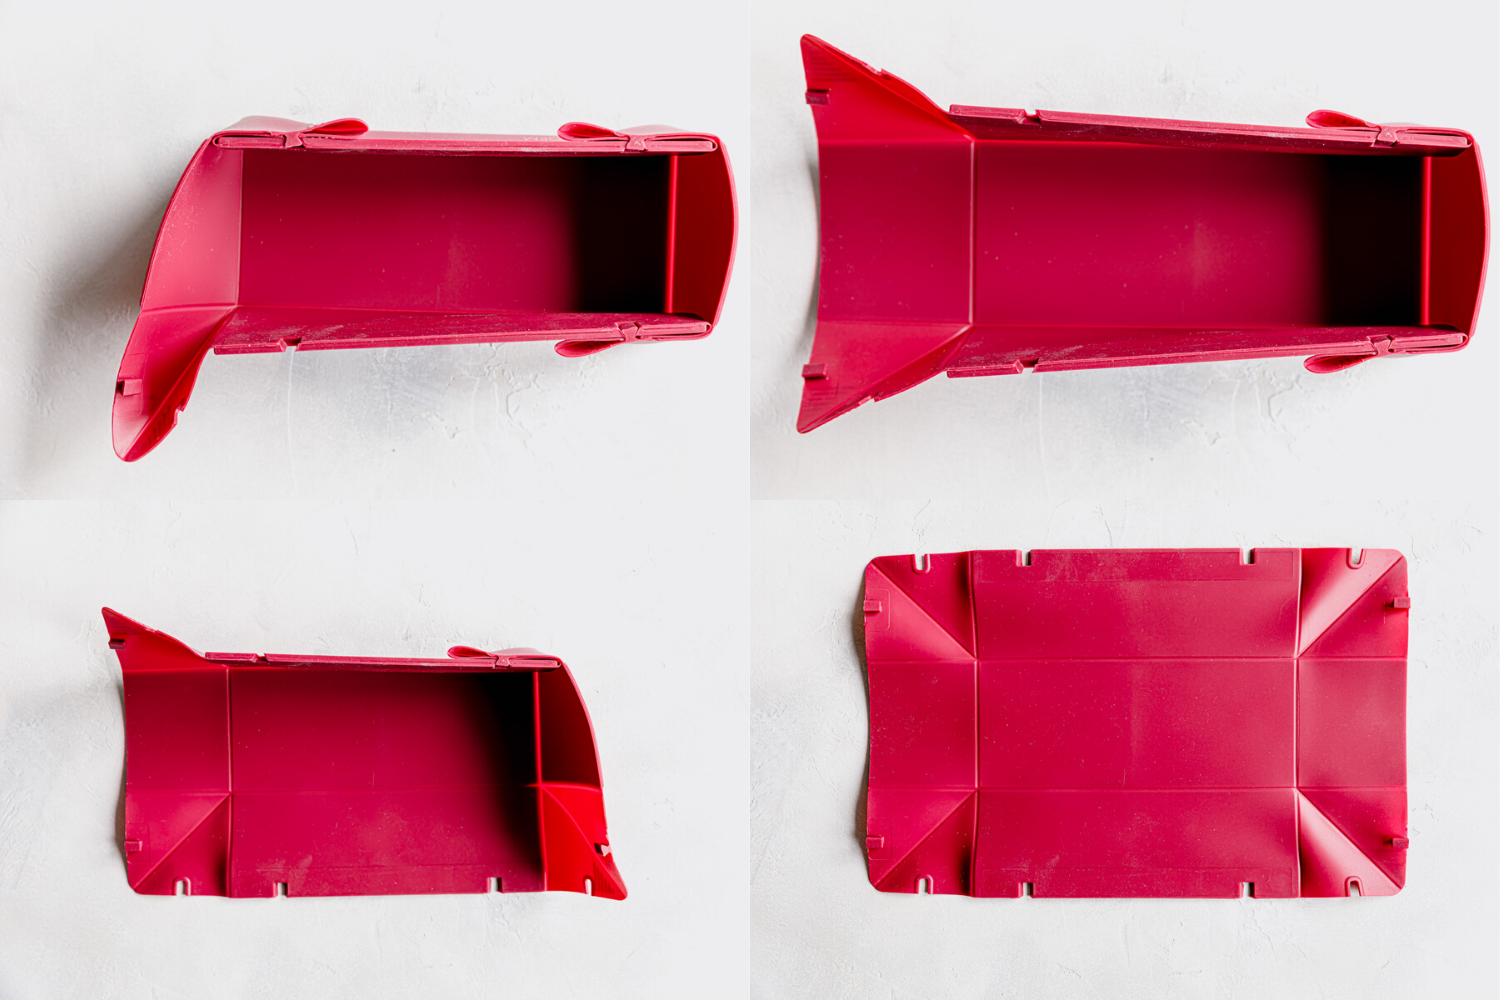
Did you notice that I didn’t mention parchment paper in the steps above? As this recipe is oil-free, parchment paper or a silicone baking mold is a must.
The down side of those options are simple: my loafs never look good. They never have clean and sharp edges. No matter how often I gently drop the baking mold on my kitchen surface prior to baking, the result is always the same. Oddly shaped loafs.
When I first saw a coox Wunderform I knew this was exactly what I have been looking for. It makes so much sense to be able to totally open up the mold. Wunderform is world’s first foldable loaf pan and I am excited to bake with it.
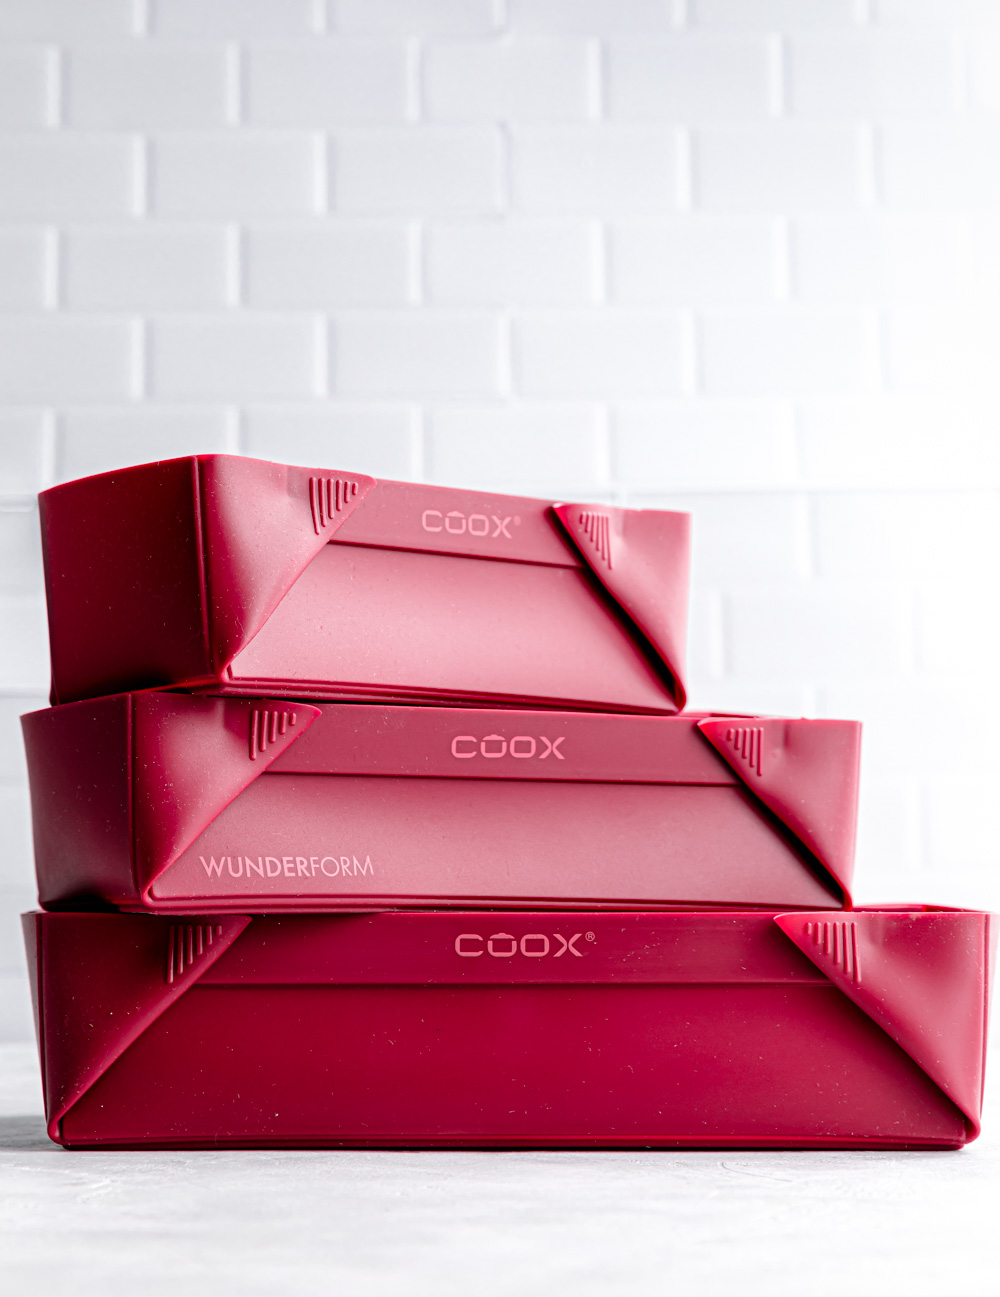
Why I love to bake with coox Wunderform
First of all, it’s non-stick. So for my oil-free baking and cooking this is a total must.
The flexible loaf pan promotes even baking so your loaf comes out perfect.
It is very easy to clean and it can be stored flat. We all know I need more space in my kitchen, right?
Also, a great advantage of this loaf pan is that you don’t need to squeeze the loaf out of the pan. You also don’t need to turn your cake or bread upside down to remove it from the pan. Simply let it cool and open up the loaf pan. So easy!
It’s made with a durable silicone non-stick coating without the chemicals. It’s dishwasher safe and it can handle very high and low temperatures (from -40 °C to +230 °C).
Other recipes
There are other great recipes you can use the coox Wunderform loaf pans for. I have for example flattened the biggest size loaf pan and baked successfully some potatoes and veggies on it.
With the warmer weather coming up, I’m thinking of making a perfectly shaped ice cream cake such as this chocolate ice cream.
As you can imagine the possibilities are endless.

Not all silicone bakeware is the same
When baking with silicone molds it’s important to try to avoid the cheap/low quality silicone bakeware.
Coox Wunderform is a brand with high quality silicone bakeware. It’s important to check if the bakeware doesn’t add extra fillers or toxic additives.
High quality silicone is 100% food grade silicone and will for example absolutely not smell.
Silicone is always safe when used in cold/freezing temperatures. The safety grade of silicone at very high temperatures is not tested thoroughly so I use my silicone bakeware at 180°C. Just to be safe until more tests are done.
But again, on paper high quality silicone bakeware is rated safe both for temperatures below freezing and up to 230 °C.
So at all times, it’s important to use high quality silicone bakeware products. You can read more about coox Wunderform here.

- This Applesauce Bread is:
- Easy to make
- No kneading
- No yeast / no rising
- Oil-free & vegan
- Sweetened without white refined sugars
If you are also going to make this applesauce bread recipe, I’d love to know! Rate the recipe below, share your creation on Facebook or Instagram, and don’t forget to tag me. I’d love to see your creations!

Want to save this Applesauce Bread recipe for later? Pin the recipe to your Pinterest boards:
APPLESAUCE BREAD (VEGAN & OIL-FREE)
- Prep Time: 10
- Cook Time: 45
- Total Time: 55 minutes
- Yield: 1x small loaf / 7-10 portions 1x
- Category: baking, bread, vegan
- Method: bake, oven
- Cuisine: vegan
Description
This vegan applesauce bread is easy to make, without any yeast or kneading. It’s made with a whole grain flour and naturally sweetened. This makes a delicious bread to serve for breakfast or as a snack.
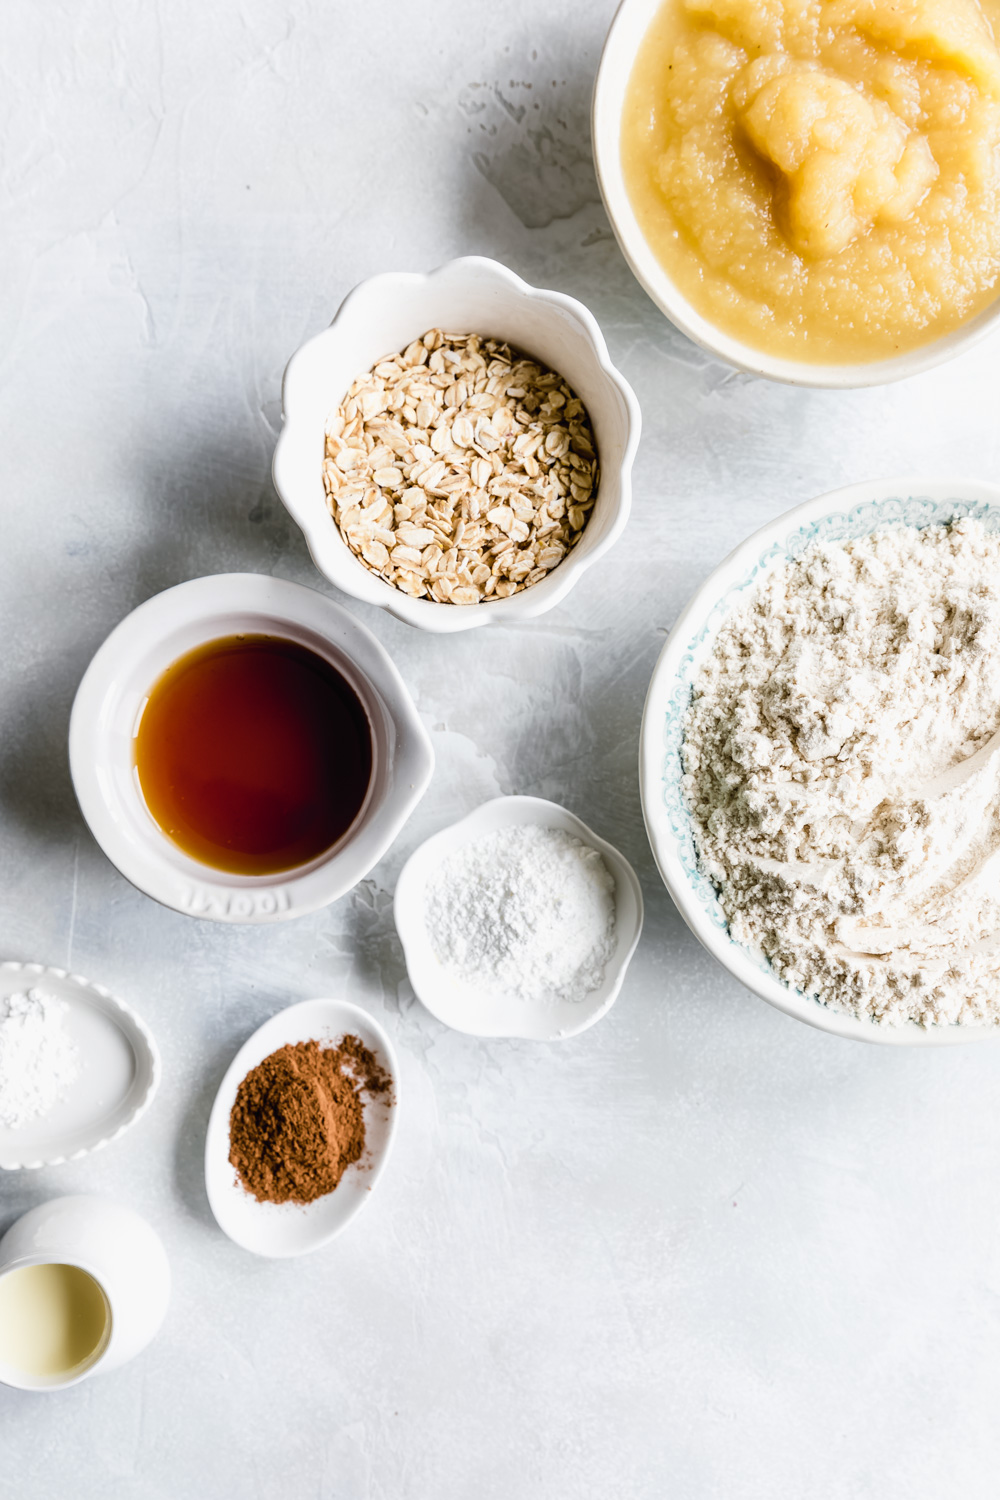
Ingredients
- 2 cups light spelt flour (all-purpose flour is also ok)
- 1/2 cup rolled oats
- 2 teaspoons baking powder
- 1/2 teaspoon baking soda
- 2 teaspoons cinnamon
- pinch of salt
- 1 1/2 cups (350 gr) unsweetened applesauce or homemade applesauce
- 1/2 cup maple syrup
- 1/3 cup unsweetened soy milk (almond milk or oat milk is also ok)
- optional: 1 teaspoon vanilla
Instructions
Preheat oven to 180°C / 350°F
Dry ingredients
In a large mixing bowl, combine the flour, oats, baking powder, baking soda, cinnamon, and salt. Mix to combine.
Wet ingredients
In the same mixing bowl, add applesauce, maple syrup and milk and mix until just combined. There is no need to overmix the batter.
Bake
Pour batter into the coox Wunderform bakeware loaf pan and place in the oven. Bake for about 45 minutes. The baking time really depends on your oven and on which tray you are baking the bread. I recommend baking the bread on the lower tray for 45 minutes. Have a look and see if your bread needs an additional 10 minutes. The bread is done when it’s golden brown on the outside and slightly moist on the inside.
Let cool (as long as you can) before slicing and serving.
The next day the flavor and texture of the bread is only better.
Notes
Leftovers
Any leftovers can be kept covered for up to 10 days in the fridge or 5 days at room temperature. You can also freeze the bread for up to 2 months.
Moist or crunchy outside
If you like a slightly crunchy outside, all you have to do is let the bread cool before serving. However, if you prefer the outside to be more moist, simply cover the bread with a clean and dry towel for about 2 hours (or longer) before serving.
Oil
If you don’t mind using oil, use about 1/3 cup of coconut oil. You will notice that the texture is less chewy if you add oil.
this recipe card contains affiliate links to produts I love